Pages

Saturday, July 17, 2010

Brownies


It is sweet indulgence time! Is there a better time to satisfy your sweet tooth than celebrating a girl's night in? (Well I can break anytime for anything chocolate!)

This week's theme at IHCC is Girl's Night In. Time to bring out the chocolate! I choose Brownies by Mark Bittman. http://dinersjournal.blogs.nytimes.com/2008/05/22/recipe-of-the-day-brownies/


The recipe was quick and only called for 7 ingredients. Waiting for the brownies to cool was a real test of patience. I did use parchment paper to line my baking pan. I confess I have never thought about that when baking brownies. They turned out of the pan rather nicely. This will be a recipe I will prepare again. I wish I had added pecans or walnuts. Oh another reason to make another batch!

~ I did use the vanilla extract. It didn't make it into the picture. I also sprinkled some shaved chocolate and powdered sugar on top of the brownies.

Brownies

Yield About 1 dozen brownies

Mark Bittman

As long as you keep the flour to a minimum and don\'t add chemical leavening like baking powder, you will produce a true and beautiful brownie.

Ingredients
  • 3 ounces unsweetened chocolate
  • 8 tablespoons (1 stick) salted or unsalted butter, more for greasing pan
  • 1 cup sugar
  • 2 eggs
  • 1/2 cup all-purpose flour
  • Pinch salt if you use unsalted butter
  • 1/2 teaspoon vanilla extract, optional
Method
  • 1. Heat oven to 350 degrees. Combine chocolate and butter in a small saucepan over very low heat, stirring occasionally. When chocolate is just about melted, remove from heat, and continue to stir until mixture is smooth. Meanwhile, grease an 8-inch-square baking pan. If you like, also line it with waxed or parchment paper and grease that.
  • 2. Transfer mixture to a bowl, and stir in sugar. Beat in eggs, one at a time. Add flour (and salt and vanilla if you are using them), and stir to incorporate. Stop stirring when no traces of flour remain.
  • 3. Pour into pan, and bake 20 to 30 minutes, or until set and barely firm in the middle. Cool on a rack before cutting.

Add Image
Add Image

Thursday, July 8, 2010

Pasta with Bacon, Spinach and Breadcrumbs

Bacon...Bacon...Bacon can be crispy, chewy, fried, broiled and oh my even deep fried. Bacon can be sweet,smokey, salty and peppery. One thing for sure bacon is one of the palate's pleasures.

This week at IHCC we are bringing home the bacon and oh Yes, it's frying in my skillet! Pasta with Bacon,Spinach, and Breadcrumbs is the Mark Bittman recipe I chose to prepare this week.

I found the recipe online. Mr. Bittman was preparing pasta dishes! YUM. Here is the link:
http://today.msnbc.msn.com/id/31412965

This was a very quick and easy recipe.However, I prepared the spinach differently than the recipe. I fried the bacon while the pasta water heated. As the pasta cooked, I added the garlic and spinach to a very small amount of the bacon drippings. The spinach cooked pretty fast and also cooked down in amount as well. The bacon was snipped into bite size pieces and mixed into the pasta/spinach mixture.

I did not add any olive oil. I felt there was "enough" added oil by using the bacon drippings. I did use Parmesan cheese to top off the dish. The pepper flakes gave a hint of a kick, not a hard "kick". Spinach goes so well with bacon, or should I say bacon goes so well with spinach?

My house smelled delicious! I forgot to add the breadcrumbs. No time was wasted as we were ready to sit down and eat. I plan on preparing this dish again. It was a quick,delicious, comfort dish.


I am also sending this in to http://www.prestopastanights.com/ which is being hosted this week by Pam at http://sidewalkshoes.blogspot.com/


Pasta with Bacon,Spinach,and Breadcrumbs (oops I forgot the breadcrumbs)
Adapted from Mark Bittman

  • 1/2 pound bacon, cut into 1/2-inch pieces
  • 3 or 4 cloves of garlic, peeled and slivered
  • 1 cup of homemade breadcrumbs
  • 1/4 teaspoon red pepper flakes, optional
  • Salt
  • Remaining spinach (about 3/4 pound), washed and trimmed
  • 1 pound spaghetti or other pasta
  • 2 tablespoons extra virgin olive oil, or more as needed
  • Freshly ground black pepper
  • Freshly grated Parmesan cheese, optional
Baking Directions

Method:

1. Put the bacon in a large skillet and cook over medium heat until it begins to brown and renders fat. Remove with a slotted spoon and set aside.

2. Add the garlic to the bacon fat, and cook, stirring occasionally until just fragrant, about 1 minute. Add the breadcrumbs and red pepper flakes, if using, and continue cooking and stirring until the garlic is lightly crisp and the breadcrumbs are just golden. Remove the garlic and breadcrumbs from the pan and set aside.

3. Bring a large pot of water to a boil and salt it. Cook the spinach until it's soft, about 1 to 2 minutes. Remove the spinach from the pan with a slotted spoon or small strainer, drain well, chop, and set aside. Using the same pot of boiling water, cook the pasta.

4. While the pasta cooks, add the oil to the skillet and warm over medium-low heat. Add the drained spinach and toss well with the oil; sprinkle with salt and pepper. When the spinach is warm add the bacon, garlic, and breadcrumbs back to the pan and mix well.

5. When the pasta is done, drain it, and add it to the skillet with the spinach, bacon, garlic, and breadcrumbs; toss until well combined. If the mixture is dry, drizzle with a bit of olive oil; adjust the seasonings, and serve with freshly grated Parmesan cheese if you like.

Friday, July 2, 2010

Chorizo, Bruschetta, Tapenade, Chicken Curry Salad


The July 4th holiday is this weekend. The fireworks will be blasting right along with the heat here in the south. It is Picnic week at IHCC!

I was searching Mark Bittman recipes one evening and found 101 simple appetizers in 20 minutes on Bittman’s minimalist column.
http://www.nytimes.com/2007/12/19/dining/19mini.html?ref=dining

There are some quick and tasty ideas there for appetizers.

I chose to prepare:
# 11. Tapenade Tapenade: Combine about 1 pound pitted black olives in food processor with 1/4 cup drained capers, at least 5 anchovies, 2 garlic cloves, black pepper and olive oil as necessary to make a coarse paste. Can also be a dip. Use sparingly; it’s strong.

#18. Bruschetta Bruschetta is the basis for so many good things. Don’t make it too crisp, and start with good country bread. Brush thick slices with olive oil. Broil until toasted on both sides. While it’s still hot, rub with cut clove of garlic on one side (optional). Drizzle with a bit more olive oil, sprinkle with salt, and serve, or top with prosciutto or tapenade.

#23. Chorizo chunks on a toothpick Cut chorizo into chunks. Cook in a lightly oiled skillet until nicely browned. Kielbasa is equally good (or better), if not as hip.
I used Mexican chorizo, fresh basil and grape tomatoes on a toothpick!

To round out the picnic I also used Bittman’s Chicken Curry Salad and added a few of my own additions. I added carrots, celery, raisins and a small amount of chopped tomato. I omitted the apple. This is a wonderful, light, spicy and fresh chicken salad served wrapped up in crisp lettuce leaves.


Chicken curry salad: Adapted from Mark Bittman

Makes 4 Servings Time: About 30 minutes
Poaching chicken in chicken stock improves both stock and chicken; you'll get delicious chicken for this salad, and great stock for the next time you need it. A delightful change from traditional chicken salad.
4 cups chicken or vegetable stock, storebought broth, or water, preferably warmed
1 pound boneless skinless chicken breast (leftover chicken is fine; don't recook it), rinsed and patted dry with paper towels
1 tablespoon mayonnaise
1 tablespoon plain yogurt (or use more mayonnaise)
Salt and freshly ground black pepper to taste
1 tablespoon curry powder or garam masala or to taste
1/2 cup peeled and diced apple or 1/2 cup lightly toasted blanched slivered almonds
1. Place the stock in a medium saucepan and bring it to a boil over medium-high heat. Turn the heat to medium-low and add the chicken breast. Cook for about 10 minutes, or until the chicken breast is cooked through. Remove the meat; strain and reserve the stock for another use.
2. Cool the chicken, cut it into small pieces, and toss it with the remaining ingredients. Taste, correct seasoning, and serve


The verdict: All the recipes were quick,easy and delicious. Each dish fits wonderfully in my picnic basket. One thing I would have done differently: I would have added just two anchovies to the tapenade. A small amount of the tapenade does go a long way! Now who wants to go on a picnic?

Thursday, July 1, 2010

A Southern Delicacy: Fried Okra and Green Tomatoes


I picked up some fresh okra and green tomatoes at our local trade day. Trade day here is held every Tuesday and Saturday morning. It is a local flea market where folks sell odds and ends, fresh, plants, anything you can imagine and Yes, fresh locally grown veggies.

I decided to fry up the okra and green tomatoes southern style!

The okra was crispy and the green tomatoes were crispy, tangy and creamy.

I remember visiting my relatives once that live above the "Mason Dixon" line. They looked at me strangely when I mention fried okra and green tomatoes. They had never tasted this southern delicacy! I searched the local markets and it was a real hunt in the north for fresh okra!
I pulled out an Aunt's iron skillet and fried my relatives up a batch. They really enjoyed the new way to eat okra.

I am also sending this one in for the side dish showdown over at Cinnamon Spice.

Side Dish Showdown Blogger Event


My recipe is easy.
1-2 pounds green tomatoes
1 1/2 - 2 pounds fresh okra
2-3 cups of oil
3 cups yellow cornmeal
2 cups all-purpose flour
salt, pepper to taste
Cayenne pepper to taste
paper towels for draining.


Wash and dry the okra and tomatoes thoroughly.
Slice the okra in half inch bites and the tomatoes in wedges.
soak the okra and tomatoes in buttermilk while your oil is heating
preheat oil to 375. Canola or vegetable oil (in a skillet, an iron skillet gives the best scald (southern term)
Add 3 cups of yellow cornmeal and 2 cups of flour to a ziploc bag
Add salt, pepper and a small amount of cayenne pepper if you would like some kick to flour
Take a handful or so of soaked okra and tomatoes add to bag, coat and drop into heated oil.
Fry until they turn a nice golden brown and begins to float.
Fry in small batches
Drain on paper towels, season to taste

voila a soothing southern delicacy!

Saturday, June 26, 2010

Pan Roasted Corn and Tomato Salad


This week's theme at IHCC is summer-loving! Yes, summer has arrived. Here in Georgia this week it has been in the high 90's very humid and a scant amount of rain has blessed us. For this weeks IHCC theme, I chose Mark Bittman's Pan Roasted Corn and Tomato Salad, (yes, another salad, it's HOT in Georgia).


Summer cooking to me is easy, sometimes fast, and doesn't require the oven. This time of year allows us to cook from nature's delicious, summertime, vegetable bounty!

I scoured the local trade day early this morning before sunup and discovered that many local farmers were there and wow their gardens must be doing very well this growing season. Is there such a thing as vegetable bliss? I picked through the corn and chose a sweet corn and what we call a "mill" corn here. Sweet corn is what is recognized most. Its the scrumptious,bright,yellow corn that we slather with butter most often. "Mill" corn is white, not quite as sweet and is used most often in frying,roasting and in wintertime vegetable soups. I decided to use a mixture of both. I also selected locally grown, vine ripe tomatoes and these Tomatoes were gorgeous.
The recipe does not call for sweet bell peppers, however, I could not resist throwing in the bell peppers and some fresh garlic.Two Serrano peppers were seeded, chopped and tossed in as well.


The bacon was cooked,removed from the skillet and allowed to drain and cool. I also poured about half of the rendered fat out of the skillet before I added the corn and onions. I wanted to crumble the bacon into the salad.

~~I also soak the ears of corn in cold water, and the do a twisting motion with my hand under cold water to remove the silks. I have read that placing the corn, husks and all in a microwave for a few minutes will also help. Haven't tried this one yet. It does sound like a good idea.


This is one fresh, veggie loaded salad! Imagine the possibilities, anything could be added.


Pan Roasted Corn and Tomato Salad: Adapted from Mark Bittman


1/4 pound bacon, chopped

1 small red onion, chopped

4 to 6 ears corn, stripped of their kernels (2 to 3 cups)

Juice of 1 lime, or more to taste

2 cups cored and chopped tomatoes

1 medium ripe avocado, pitted, peeled and chopped

2 fresh small chilies, like Thai, seeded and minced

Salt and black pepper

1/2 cup chopped fresh cilantro, more or less.

1. Cook bacon in a large skillet over medium-high heat until it begins to render fat; add onion and cook until just softened, about 5 minutes, then add corn. Continue cooking, stirring or shaking pan occasionally, until corn begins to brown a bit, about 5 more minutes; remove from heat and let cool for a few minutes. Drain fat if you wish.

2. Put lime juice in a large bowl and add bacon-corn mixture; then toss with remaining ingredients. Taste, adjust the seasoning and serve warm or at room temperature.

Yield: 4 servings.

http://www.nytimes.com/2009/08/19/dining/191mrex.html?_r=3&ref=dining

Tuesday, June 22, 2010

CRAVING


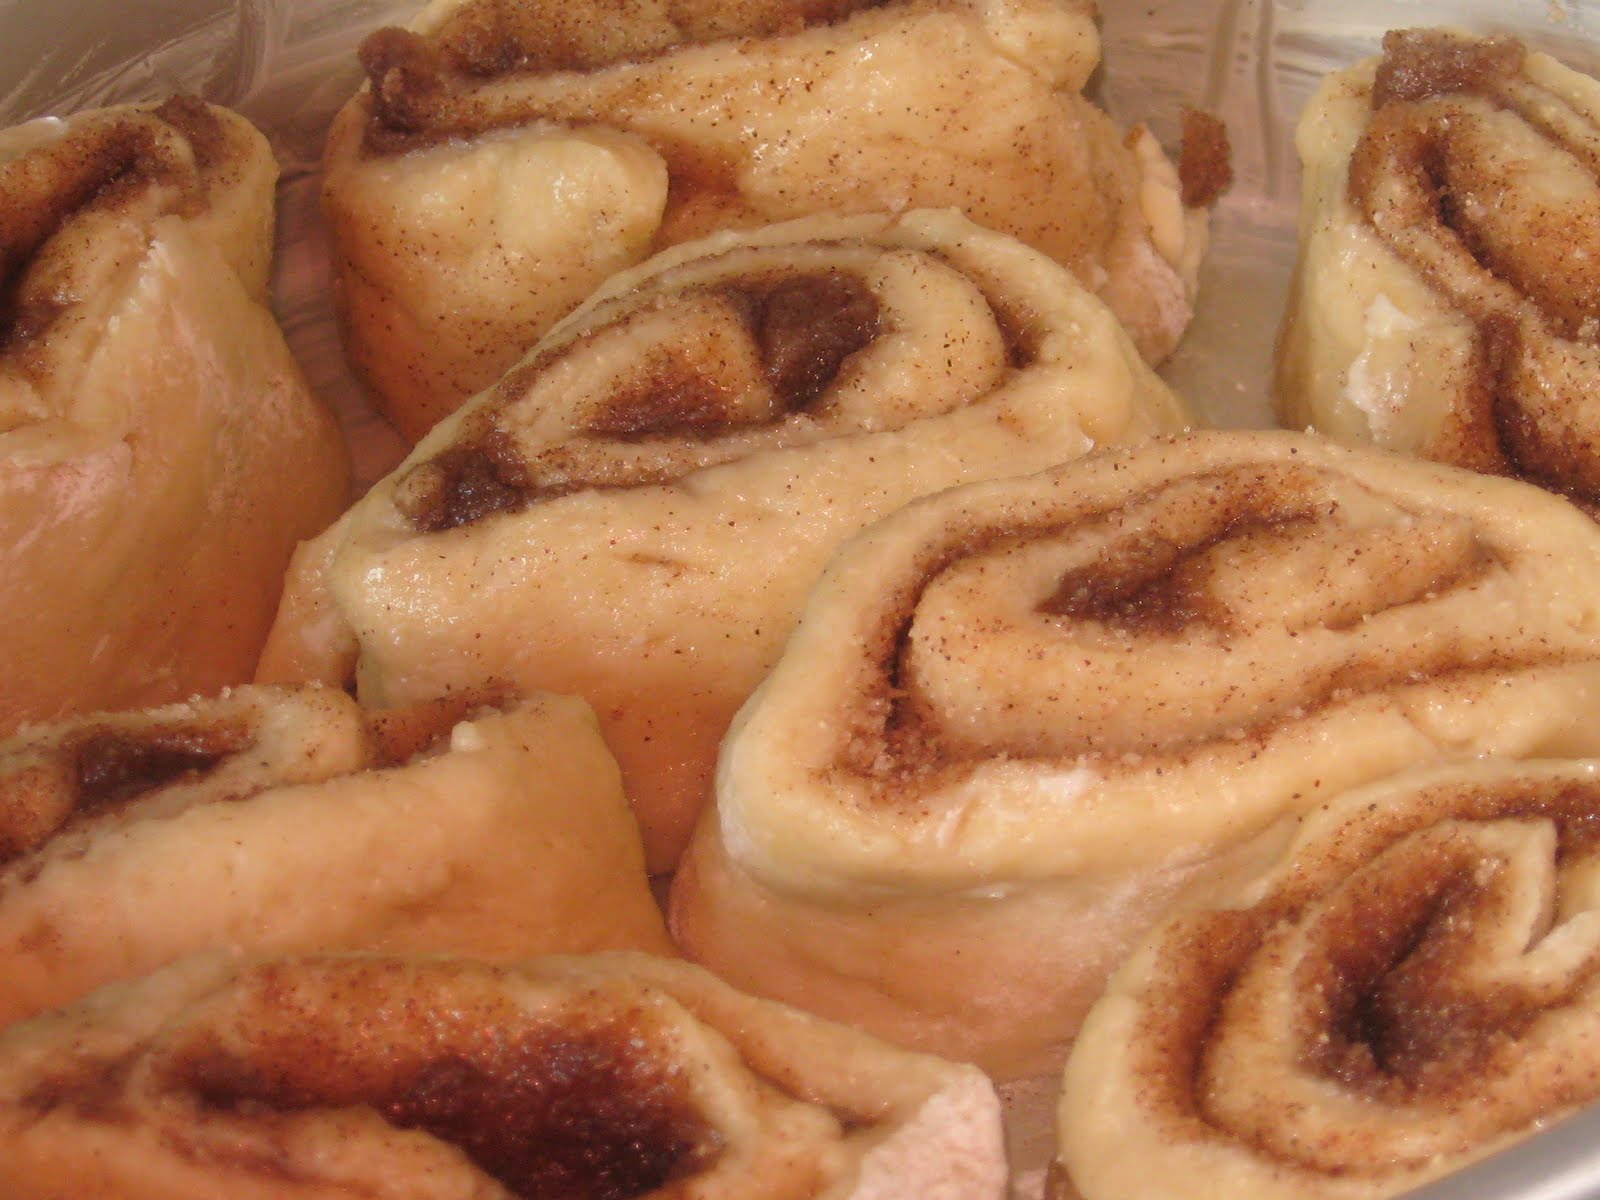
Have you ever had a craving for something and that craving just would not subside until you indulged your craving?

Oh my I had my crave going on! Pizza was on "the brain" and my taste buds were on overdrive reminiscing about crust, garlic and cheese!

I honestly attempted to keep it healthy and made my own veggie pizza. I did borrow the dough recipe from Mark Bittman.

I topped the veggie heavenly pizza with: Olives, black and green, Tomatoes, artichokes, onion, mushrooms,garlic, mozzarella cheese and had just a smidgen of sauce. YUM...

My craving was satisfied!


Basic Pizza Dough (Mark Bittman)
You can knead this dough with a mixer (use the dough hook), or by hand, but I like the food processor best. The pizzas can be grilled or baked in an oven—the hotter the better (commercial pizza ovens I, are usually about 700°). This is the simplest, most basic pizza (and bread) dough you can make. Olive oil makes a smoother, more flavorful dough and a slightly cracklier crust—but You can omit it if you like—just add a little more water to the dough if you do.
Yield: Makes 1 large or 2 or more small pizzas Cooking Time: At least 1 hour, largely unattended
Ingredients
1 teaspoon instant or rapid-rise yeast
3 cups (about 14 ounces) all-purpose or bread flour, plus more as needed
2 teaspoons coarse kosher or sea salt, plus extra for sprinkling
1 to 1¼ cups water
2 tablespoons plus 1 teaspoon olive oil
Directions
1 Combine the yeast, flour, and 2 teaspoons salt in the container of a food processor. Turn the machine on and add 1 cup water and the 2 tablespoons of oil through the feed tube.
2 Process for about 30 seconds, adding more water, a little at a time, until the mixture forms a ball and is slightly sticky to the touch. If it is dry, add another tablespoon or two of water and process for another 10 seconds. (In the unlikely event that the mixture is too sticky, add flour, a tablespoon at a time.)
3 Turn the dough onto a floured work surface and knead by hand a few seconds to form a smooth, round dough ball. Grease a bowl with the remaining olive oil, and place the dough, in it. Cover with plastic wrap or a damp cloth and let rise in warm; draft-free area until the dough doubles in size, 1 to 2 hours. You can, cut this rising time short if you are in a hurry, or you can let the dough rise more slowly, in the refrigerator, for up to 6 or 8 hours.
4 Proceed with any recipe below, or wrap the dough tightly in plastic wrap and freeze for up to a month. Defrost in a covered bowl in the refrigerator or at room temperature.
To make this dough by hand: Combine half the flour with the salt and yeast and stir to blend. Add 1 cup water and: the 2 tablespoons olive oil; stir with a wooden spoon until smooth. Add remaining flour a bit at a time; when the mixture becomes too stiff to stir with a spoon, begin kneading, adding as little flour as possible-just enough to keep the dough from being a sticky mess. Knead until smooth but still quite moist, about 10 minutes. Proceed as above.
Notes
Crunchier Pizza Dough: This dough may be a little more difficult to handle but it has superior flavor and a pleasant crunch Substitute ½ cup cornmeal for ½ cup of the flour.
Six Quick Ideas for More Flavorful Pizza Dough
The options are infinite, but be careful; you want the dough to cook up crisp, and too many additions will make it soggy. You also want it to act as a flavor carrier not as the dominant flavor. But before adding the water to the dough, try the following, alone or in combination:
1. Add one-half to one teaspoon freshly cracked black pepper.
2. Add one tablespoon upureed cooked garlic (roasted is best) or one-half teaspoon minced raw garlic, on to taste.
3. Add one teaspoon to one tablespoon fresh herbs.
4. Substitute one-half cup to one cup whole wheat or semolina flour for the white flour.
5. Add one-fourth to one-half cup minced prosciutto, ham, or cooked bacon.
6. Use flavored olive oil, such as garlic or rosemary oil, in place of regular olive oil.

Saturday, June 19, 2010

Okra Salad


This week's theme at IHCC is Dining with Dad. I searched for a recipe that would remind me of Dad and one that he would enjoy.

My Dad is a do-it-yourself kinda guy. He rarely has dinner out and prefers to cook his own meals. I have to admit my step mother has not one problem with handing her kitchen over to Dad. He prefers simple, southern country cooking and he is an awesome cook!

I chose Mark Bittman's Okra Salad for this week's theme. When I was young Dad always planted a huge garden. I remember one year the garden consumed nearly all of our Atlanta suburban back yard! I also remember being handed a shovel to help unload the "fertilizer" that he would procure from the local stables. Dad grew tomatoes, peppers, squash,beans, onions,corn and okra. I am sure there were other odds and ends growing in his garden. I really remember the okra, because he grew so much of it and for many years I did not care for okra cooked any way other than fried.

The recipe is very easy and light on the wallet as well. I did not have access to the Chaat Masala. I wanted to make my own, and here in the mountains of Northwest Georgia, the ingredients just are not available. Alas, I made my own mixture with what I had and it tasted great.
I used fresh ground cumin, black pepper, salt, and cayenne.

The recipe does not call for flouring the okra. However, I am a southern girl and frying okra naked just isn't right. So I added some of the spice mixture I made to a ziploc bag, threw in some flour,the sliced okra and shook and coated the okra before frying. It was not a crusty okra but I believe the flour added some depth and more crunch. After I removed the okra from the skillet, I would sprinkle each batch with the spice mixture. I chose not to use cilantro. I love it. However, my sons do not enjoy it's yumminess.
I then mixed the cooled okra with the tomatoes, red onion and ended with the juice of a lemon. Even though the okra was fried, it was light in taste and is truly a salad.

Now I wonder how the okra would handle being baked or roasted until its dark and crispy. I am going to experiment with that as well and will also try it with curry.

I am also sending this dish in to The Side dish showdown.


My next trip to the capital, "big city", I hope to find the Chaat Masala, or the ingredients to make my own.

**When frying the okra sliced this way, beware: The seeds may pop out of the skillet. Throw in a handful at a time and cook in batches. No need to turn the okra or stir it.


Okra Salad (Adapted from Mark Bittman)

Ingredients
Neutral oil, like corn or canola, for frying
1 pound okra, stemmed and julienned lengthwise
½ small red onion, thinly sliced
2 small or 1 medium tomato, cored, seeded, and julienne sliced
¼ cup chopped fresh cilantro leaves, for garnish
½ lemon, or more as needed
1½ teaspoons Chaat Masala, store bought or homemade, or more to taste
½ teaspoon salt, or more to taste
Directions
1. Heat at least 2 inches oil to 350°F (you can check this with a deep-fry or instant-read thermometer) in a countertop deep fryer or in a heavy pot on the stove.
2. Fry the julienned okra in batches small enough not to crowd your pan or fryer and make sure to let the oil return to temperature (350°F) between batches. Fry it until crisp, 5 to 7 minutes—the seeds will swell and it will be deeply colored at the edges—then transfer to drain on paper towels.
3. Toss the okra together with the onion, tomato, and cilantro, squeeze the lemon juice over all, and season to taste with Chaat Masala and salt.

Side Dish Showdown Blogger Event

Thursday, June 10, 2010

No Knead Bread


This week at IHCC it is potluck week again! I have many Mark Bittman recipes saved and on my "to do" list, So many recipes, so many possibilities. This week I chose Bittman's No Knead Bread and I chose this recipe for several different reasons. 1. It is an easy recipe. 2. It's practically "Hands off"3. The smell of hot bread is wonderful. 4. I am not a "baker" usually and this read as a no fail recipe.

Preparing the mix and walking away for so many hours was easy. (I recall doing the same with the overnight waffles.) I did let the mix rest, sit and work for 19 hours.
The most difficult part of this recipe was the wait. We could not wait to slather the loaf with butter, jam or jelly.

Adding sesame seeds to the top of the dough really worked well and tasted delish. I will experiment more with this recipe and see how adding different herbs and some spice will work out. However, on its own the bread was delicious!


No Knead Bread (Mark Bittman)

  • 3 cups All purpose flour (or bread flour), more for dusting
  • 1/4 teaspoon Instant yeast
  • 1 1/4 teaspoons Salt
  • Cornmeal (or wheat bran), as needed
  • 1 5/8 cups Water


1. In a large bowl combine flour, yeast and salt. Add 1 5/8 cups water, and stir until blended; dough will be shaggy and sticky. Cover bowl with plastic wrap. Let dough rest at least 12 hours, preferably about 18, at warm room temperature, about 70 degrees.

2. Dough is ready when its surface is dotted with bubbles. Lightly flour a work surface and place dough on it; sprinkle it with a little more flour and fold it over on itself once or twice. Cover loosely with plastic wrap and let rest about 15 minutes.

3. Using just enough flour to keep dough from sticking to work surface or to your fingers, gently and quickly shape dough into a ball. Generously coat a cotton towel (not terry cloth) with flour, wheat bran or cornmeal; put dough seam side down on towel and dust with more flour, bran or cornmeal. Cover with another cotton towel and let rise for about 2 hours. When it is ready, dough will be more than double in size and will not readily spring back when poked with a finger.

4. At least a half-hour before dough is ready, heat oven to 450 degrees. Put a 6- to 8-quart heavy covered pot (cast iron, enamel, Pyrex or ceramic) in oven as it heats. When dough is ready, carefully remove pot from oven. Slide your hand under towel and turn dough over into pot, seam side up; it may look like a mess, but that is okay. Carefully shake pan (it's hot) once or twice if dough is unevenly distributed; it will straighten out as it bakes. Cover with lid and bake 30 minutes, then remove lid and bake another 15 to 30 minutes, until loaf is beautifully browned. Cool on a rack.

Thursday, June 3, 2010

Pork Chops with Sage and Balsamic Vinegar


This week's them at IHCC is Herbs. So many herbs and so little thyme. (insert laugh, or snicker).

I chose Mark Bittmans Pork Chops with Sage and Balsamic vinegar.

Sage is the herb that reminds me of cornbread dressing and country sausage. I wanted to see just how sage would taste prepared differently than what my family is accustomed to. It is a wonderful, smokey and savory herb!

My youngest son came into the kitchen as I prepared dinner and said. "I smell sausage. Mom are we having sausage for dinner?" He was disappointed that he was not having waffles and sausage for dinner. However, he did eat all of his sage covered pork chop.


I soaked the chops in a brine for a few hours.

Pork Chops with Sage and Balsamic

- serves 2 -
Adapted from Mark Bittman

Ingredients

2 not-too-thick pork chops
1 tablespoon neutral oil, such as canola
1/4 teaspoon sugar
6-8 sage leaves, roughly chopped
Balsamic vinegar to taste
Salt and pepper

Procedure

1. If at all possible, salt the chops a few hours before cooking, though it's not necessary. Make sure the chops are very dry, then rub with the sugar and salt (to your liking) on both sides. Add the oil to a cold pan and lay the pork chops down, pressing firmly. Turn on the heat to medium and cook, undisturbed, for 5 to 6 minutes.

2. Flip the chops and cover, cooking on the other side for an additional 2 to 3 minutes until the pork is cooked through.

3. Uncover, remove the chops, and add the sage leaves. Increase the heat to high and scrape up any pan drippings as the sage gets slightly crisp.

4. Drizzle the pork chops with the pan sauce and balsamic vinegar, to taste. Crack fresh black pepper and serve immediately.

Wednesday, May 19, 2010

Tomato Jam


It is potluck week at IHCC. I wanted something spicy, tangy and a little sweet. I chose Mark Bittman's Tomato Jam recipe for this week's pot luck theme.

Never have I thought to make jam out of tomatoes! I am a tomato lover and enjoy tomatoes in many ways. I look forward each summer to those locally grown tomatoes for toasted tomato sandwiches. Toasted bread, mayo, salt and pepper together are awesome! A simple tomato sauce with pasta is addictive and comforting. Oh and I can't leave out tomato dumplings.(That is another post and I wonder if anyone else has ever had Tomato dumplings?) Back to the recipe as I check back in from my tomato dreams.

I saw this recipe and thought sweet,tangy and spicy all together with one of my most favorite foods.

The recipe is very EASY! I literally threw everything into the pot and left it! Well I did go back to stir here and there, I just wanted to inhale deeply over the pot. I also used "regular" vine tomatoes. The recipe yields about a pint. I think next time I will double the recipe.

The jam keeps very well in the fridge and I slathered it on toasted french bread.


IHCC Side Dish Showdown Blogger Event

Tomato Jam Mark Bittman

1-1/2 pounds good ripe tomatoes (Roma are best), cored and coarsely chopped
1 cup sugar
2 tablespoons freshly squeezed lime juice
1 tablespoon fresh grated or minced ginger
1 teaspoon ground cumin
1/4 teaspoon ground cinnamon
1/8 teaspoon ground cloves
1 teaspoon salt
1 jalapeno or other peppers, stemmed, seeded and minced, or red pepper flakes or cayenne to taste

1. Combine all ingredients in a heavy medium saucepan, Bring to a boil over medium heat, stirring often.

2. Reduce heat and simmer, stirring occasionally, until mixture has consistency of thick jam, about 1 hour 15 minutes. Taste and adjust seasoning, then cool and refrigerate until ready to use; this will keep at least a week.

Yield: About 1 pint.

Sunday, May 16, 2010

Pan Fried Pizza. with a Friend


It's movie theme night at IHCC this week. While I did not watch a movie this weekend, I did travel and spent time shopping and cooking with a friend(s). (If you count the two pound puppy nipping at our ankles!) I chose Mark Bittman's pan fried pizza recipe and we added a few of our own ingredients. One of my all time favorite movies is the God Father. I haven't lounged and watched the movie in quite some time. However, it is on my "to do" list.


The pizza was very tasty and the possibilities are endless on what to use as toppings.
We snacked on leftovers the following day and the pizza tasted even better.

The recipe was easy and made an eatable pizza but might not replace the classic baking method but a nice change to a traditional pizza taste. The pizza comes out more as a pan style pizza.

The recipe makes four servings and all small enough to be slipped into a freezer bag for later enjoyment!

On our pizza we used fresh basil, mushrooms, garlic, roasted red peppers, and artichoke hearts along with a nice mound of mozzarella cheese.


Placing the lid on the skillet to melt the cheese worked very well. Also as we prepared the pizza, we learned that the first side that is fried/cooked really needs to cook a good time to prevent the center from being "gooey".

Use oil sparingly in the pan as well.

Mark Bittman's Pan Fried Pizza: (see the link below for a video of Mark!)

Time: About 2 hours
2 cups all-purpose or bread flour, more as needed
3/4 teaspoon instant yeast
1 teaspoon coarse salt
3 tablespoons extra virgin olive oil, more for cooking
About 2 cups any light, fresh tomato sauce, warmed
Sliced mozzarella to taste
Salt and black pepper
Prosciutto slices and basil leaves for topping (optional).
1. Combine flour, yeast and salt in a food processor. Turn machine on and add 1/2 cup water and 2 tablespoons oil through feed tube. Process for about 30 seconds, adding more water, a tablespoon or so at a time, until mixture forms a ball and is slightly sticky to the touch. (If mixture becomes too sticky, add flour a tablespoon at a time.)
2. Put one tablespoon olive oil in a bowl and turn dough ball in it. Cover bowl with plastic wrap and let rise until dough doubles in size, 1 to 2 hours. When dough is ready, re-form into a ball and divide it into 4 pieces; roll each piece into a ball. Place each piece on a lightly floured surface, sprinkle with a little flour, and cover with plastic wrap or a towel. Let rest until each puffs slightly, about 20 minutes.
3. When ready to cook, press one ball into about a 10-inch round. Use a little flour, if needed, to prevent sticking and a rolling pin, if desired. Film a 10-inch skillet with olive oil and turn heat to medium. When oil shimmers, put dough in pan and adjust heat so it browns evenly without burning. (If dough puffs up unevenly in spots, push bubbles down.)
4. Turn dough, then top browned side with tomato sauce, cheese, a bit of salt and pepper, and, if you like, prosciutto and/or basil leaves. If top is now heavily laden, cover pan and continue cooking, or run it under broiler, just until toppings become hot. With only a couple of toppings, just cook until bottom browns. Repeat with remaining dough; serve hot, warm or at room temperature.

http://www.nytimes.com/2007/11/07/dining/07mini.html

Friday, May 7, 2010

Cinnamon Rolls and a memory of my Maw Maw


This week's theme at IHCC is breakfast in bed. I thought this such an appropriate theme with Mother's Day weekend right around the corner. There is nothing like waking up, smelling something wonderful coming from your kitchen and focusing your sleepy eyes on a delicious tray of food being served to you in bed. Thinks silently: "Pamper me, pamper me!" Why I would not even have to paint my face or "do" my hair. (note to self: put sticky notes on fridge as hints for my special guys.)

I chose Mark Bittman's Basic cinnamon Rolls recipe for my treat in bed. Okay, I prepared it, but I did lay across my bed and watched a few minutes of Lifetime television as I bit into the warm, iced, sugary cinnamony(not a word according to spell check, but is now an adjective in my home.) goodness that melted in my mouth. The cinnamon roll was warm, gooey and heavenly. I hardly noticed what was happening on the lifetime movie, no hero hunk, or sexy villain, not even someone professing love and desire could grab my attention.The cinnamon roll had my full attention! I was in the cinnamon roll zone!


Have you ever smelled something, or ate something that took them back in time, or perhaps brought back to your memory a special moment in your life? As I fought the urge to peek into the oven, and the smells wafted throughout my home it happened to me.

My Maw Maw, grandmother, baked cinnamon rolls. I remember Saturday mornings waking up, turning on cartoons and waiting for Maw Maw to finish breakfast. It was a special Saturday when Maw Maw would bake cinnamon rolls. She made them perfectly and mine today did not compare. What a sweet remembrance I experienced today in my kitchen. Doing something I love doing and remembering my Maw Maw, someone I love and my "mom" who played a huge part in raising me.

So yes, a very appropriate recipe for breakfast in bed, and for Mother's day. A recipe that brought back a special memory of my Maw Maw.


This is not a health conscious recipe. Perhaps some of the fat and calories could be tweaked if one used fat free cream cheese, and maybe just used less icing. Hey, it's Mother's Day soon, every mom deserves a treat.


***For the icing I used Honey nut cream cheese and I also buttered my cake pan. No way was I going to risk stickage. This is a basic recipe. Gosh, the possibilities could be endless..YUM. I was a patient,hungry and lurking grasshopper and let the dough rise for three hours.


Mark Bittman's Basic Cinnamon rolls:

Ingredients

    For the dough:
    2 1/2 cups All purpose flour
    1 1/2 tsp. instant yeast
    1/2 tsp. salt
    1/3 cup sugar.
    2 Tb. butter
    1 egg
    1/2 cup milk
    1/2 cup sugar
    2 tsp cinnamon

    Cream Cheese Icing

    8 tbs (1 stick) unsalted butter, softened
    1 1/2 cups powdered sugar
    1/4 cup (2 oz) cream cheese
    1/2 tsp vanilla extract
    pinch of salt
    2-4 tbs cream (optional)

Directions

In food processor with steel blade, combine:
2 1/2 cups all purpose flour
1 1/2 tsp. instant yeast
1/2 tsp. salt
1/3 cup sugar.
Pulse for 5 seconds. Then add:
2 Tb. butter
1 egg
and ****1/2 cup milk, drizzling in slowly*****
Process until dough ball forms, then knead dough until smooth and elastic. Place in a buttered bowl, let rise until doubled (at least 2 hours).
After rising, roll out dough into 1/2 inch-thick rectangle. Brush liberally with melted butter, spread with a mixture of 1/2 cup sugar and 2 tsp cinnamon. Roll it up, seal the edges, and cut into 1- to 1-1/2- inch slices. Place individually in muffin tin or nestled together in round cake pan (Nadia notes: nestled snugly tastes better; they get too crispy in muffin tins), and let rise about 1 hour longer. Brush with additional butter and sprinkle with more cinnamon sugar, bake in 400-degree oven for about 20-25 minutes.

Cream Cheese Icing

8 tbs (1 stick) unsalted butter, softened
1 1/2 cups powdered sugar
1/4 cup (2 oz) cream cheese
1/2 tsp vanilla extract
pinch of salt
2-4 tbs cream (optional)

Mix all the ingredients except for the cream together in a medium bowl until fluffy. If it's too thick for your tastes, add some of the cream. Try not to eat it all before getting it onto the cinnamon buns.

makes 8 huge rolls

Thursday, April 29, 2010

Spicy Supercrunchy Fried Chicken


This week at IHCC the theme was spice week. I searched for recipes, arranged my spices from sweet to mild to hot and then I arranged them alphabetically. I just could not decide on one specific recipe. Until the one that caught my eye late Tuesday night. The term fried chicken is not uncommon here in my home. However, with Mark Bittman's spice kick added and a different coating technique , it turned out to have a totally different taste than my southern, iron skillet scalded fried chicken recipe.

Never have I thought about adding curry, chili pepper and allspice to my fried chicken! This recipe was also different in the way that the chicken is battered. In the past, I have always had a plate of flour with the spices added, and a bowl for the egg and milk. and would roll, dip and then roll again. The recipe calls to add EVERYTHING together in a bowl. I used a gallon sized zip lock bag to mix it all together. The batter was thick and remained on the chicken very well. Warning: Things could become a 'lil messy at this point, but well worth the goo.

I used Betsy, my iron skillet and corn oil.

I also used boneless chicken breasts for two reasons. 1. They cook so much faster. 2. My youngest son's newest line when having chicken for dinner is.."Does it have bones?" (shrugs, not sure when his preference switched to boneless chicken. hahaha.)

To maintain some sort of healthiness to the fried chicken, I did remove the skin. I know it's a sin to some in the south to de-skin the chicken..my hips will thank me later!

Served with seasoned collard greens and pinto beans made for a spicy southern meal.

Spicy Supercrunchy Fried Chicken (Mark Bittman)
Ingredients
  • 1 good chicken, cut into serving pieces, or use 8 to 10 leg pieces (drumsticks and thighs), trimmed of excess fat
  • Salt and pepper to taste
  • 1 tablespoon curry powder
  • 1/2 teaspoon ground allspice
  • 2 tablespoons minced garlic
  • 1 Scotch bonnet (habanero), or other fresh chili, stemmed, seeded and minced, or cayenne to taste, optional
  • 1 egg
  • 1 cup flour
  • A mixture of lard and butter, as needed, or olive oil, or neutral oil like corn or grapeseed
  • Lemon or lime wedges for garnish
Method
  • 1. In a bowl, toss the chicken with salt, pepper, curry, allspice, garlic, chili, egg and 2 tablespoons water. When everything is combined, blend in the flour, using your hands. Keep mixing until most of the flour is blended with the other ingredients and the chicken is coated (add more water or flour if mixture is too thin or too dry; it should be dry but not powdery). Let sit while you heat the fat.
  • 2. Choose a skillet or casserole at least 12 inches in diameter that can be covered. Add enough fat to come to a depth of about 1/2 inch and turn heat to medium-high. If you\'re using butter, skim any foam as it rises to the surface.
  • 3. When the fat is hot (a pinch of flour will sizzle) raise heat to high. Slowly add chicken pieces to skillet (if you add them all at once, temperature will plummet). Cover skillet, reduce the heat to medium-high, and cook for 7 minutes.
  • 4. Uncover the skillet, turn the chicken and continue to cook, uncovered, for another 7 minutes. Turn the chicken again and cook for about 5 minutes more, turning as necessary to ensure that both sides are golden brown.
  • 5. Remove the chicken from skillet and drain on paper towels. Serve chicken at any temperature, with lemon or lime wedges.

Thursday, April 22, 2010

Pot stickers...The orient visits small town georgia


This week's theme on IHCC was POT LUCK with Mark Bittman. I wanted to try something new and chose pot stickers. Oh my pot stickers for pot luck week!

My oldest son was visiting and we decided to cook together today. We had lots of fun!!!
We served the stickers with fried rice and steamed zucchini. yum.

The dipping sauce was made with: Honey, vinegar, olive oil, scallions, garlic and red pepper flakes all mixed together. It was sweet,sour and spicy.

The recipe was very easy and I finally had a chance to use my bamboo steamer. YAY. Being the "freezer freezing queen" that I am, I of course experimented with freezing a few. I placed the stickers on a piece of wax paper right after the wrapping step and after they were frozen, I transferred the pot stickers to a closed dish and stored them.

***These may be cooked either fresh or frozen.

I used my bamboo steamer after browning one side in a skillet. A pot steamer may be used or the same skillet that is used to brown one side can also be used.


POT STICKERS (Mark Bittman)

Makes At least 24 dumplings (4 to 8 servings)
Time: 30 to 45 minutes

Make these with round wonton or gyoza wrappers, 3 or 4 inches in diameter. Panfried until crisp on the bottom and then cooked through by steaming, they are just as easily simply steamed. Either way they are wonderful, and either way they should be served immediately. You can fill and dust them with flour and then refrigerate them, covered, for a couple of hours or freeze them for a few days before cooking (you can cook them frozen or thawed), but they're really best when cooked right after filling. Gyoza is the Japanese version of this type of dumpling; mandoo is the Korean version. They may be filled with pork, shrimp or other shellfish, vegetables, or-in the Korean model-a mixture of kimchi and other food.

1/2 pound ground pork, chicken, or other meat
1/4 cup minced scallion
1 cup washed and chopped leek, Napa cabbage, or bok choy
1 teaspoon minced fresh ginger
1 teaspoon rice wine or dry sherry
1 teaspoon sugar
1 tablespoon soy sauce
1 tablespoon dark sesame oil
1 egg, lightly beaten
1 teaspoon freshly ground black pepper
Large pinch salt
24 round dumpling skins
Peanut oil or neutral oil, like grapeseed or corn, as needed

1. Combine the first eleven ingredients and mix gently but thoroughly. Put about 2 teaspoons of the filling in the center of a wrapper, then moisten the edge of the wrapper with water and fold over to form a semicircle. Press the seam tightly to seal; it's best if there is no air trapped between the filling and wrapper. Set on a lightly floured plate or wax paper. (At this point, you may cover tightly and refrigerate for up to a day or freeze for a couple of weeks.)

2. Coat a large, deep skillet with a thin layer of oil and turn the heat to medium-high. Put the dumplings, one at a time, into the skillet, seam side up, leaving space between them (you will probably have to cook in 2 batches). Turn the heat down to medium, then cover and cook for about 5 minutes. Add 1/2 cup water to the skillet, then cover and cook for another 2 minutes. Remove the lid, turn the heat to high, and cook until the water has evaporated, about 3 minutes. Remove the dumplings and serve with dipping sauce.

Steamed Dumplings.

Set up a steamer in a covered pot. Lightly oil the steamer or plate to prevent sticking. Steam the dumplings in one or two batches for about 10 minutes per batch. Serve immediately with dipping sauce.

Friday, April 16, 2010

Overnight Waffles...YUM


The IHCC continues with the exploration of Mark Bittman recipes. This week's theme was Pantry Raid. I lost count how many times I opened my cabinets to ponder the possibilities. I decided on a waffle recipe by Mark Bittman. It is an overnight recipe and was very easy to mix up. I mixed, covered and walked away for the night. While I slept, the waffle batter "brewed".

I awoke to find the batter nearly doubled and it smelled wonderful. I substituted almond extract instead of using vanilla and I also added lemon zest.

The last step was to mix in the eggs, oil the waffle maker and preheat. I confess that I have not oiled the griddle part of the maker in a very long time. Trust had developed over time and I avoided the oil. The first batch came out in pieces and some of those pieces were stuck to the griddle. Now I don't trust my waffle maker! LAUGHS.. Okay, it is my fault. However, now when I add batter, close the lid and lock it, I wonder how "they" the waffles are doing in there because one can't see what's happening. I did brush the griddle for the rest of the waffle batch and they came out perfect.

A few strawberries later and a drizzle, (or two, maybe three) of syrup my sons were happy and full.

p.s. These froze very well and make 16 waffles.


OVERNIGHT WAFFLES: (Mark Bittman)


Ingredients

  • 1/2 teaspoon Instant yeast
  • 2 cups All purpose flour
  • 1 tablespoon Sugar
  • 1/2 teaspoon Salt
  • 2 cups Milk
  • 8 tablespoon Butter melted and cooled
  • 1/2 teaspoon Vanilla extract optional ( I used almond extract)
  • Canola Oil for brushing on waffle iron
  • 2 eggs
*I also added the zest of one lemon. With waffles anything works.

Preparation

1. Before going to bed, combine the dry ingredients and stir in the milk, then the butter and vanilla. The mixture will be loose. Cover with plastic wrap and set aside overnight at room temperature.

2.Brush the waffle iron lightly with oil and preheat it. Separate the eggs and stir the yolks into the batter. Beat the whites until they hold soft peaks. Stir them gently into the batter. (I just stirred the eggs into the batter without separating them. Seemed to work well.)

3. Pour batter onto the waffle iron and bake until the waffle is done, usually 3 to 5 minutes, depending on your iron. Serve immediately or keep warm for a few minutes in a low oven.


Wednesday, April 14, 2010

Maggie's Country Kitchen: Pretzel snacking

Maggie's Country Kitchen: Pretzel snacking

Pretzel snacking


How can anyone turn down a hot, buttery, crispy and chewy pretzel? I know I can't! Making pretzels is fun and creative. My family awaits not so patiently, eyeballing the rising dough and wishing for the soda water to hurry up and boil. The times I have heard "are they finished?" are countless.
The recipe is very basic and I sometimes top with sesame seeds, garlic,salt or if my sweet tooth is screaming I will sprinkle sugar on top. The possibilities are endless.

http://en.wikipedia.org/wiki/Pretzel

SOFT PRETZELS: (Adapted from Bobby Flay)

1 1/2 cups warm water
2 tablespoons brown sugar
1 1/2 teaspoon dry active yeast
3 ounces unsalted butter, melted
2 1/2 teaspoons kosher salt
4 1/2 to 5 cups all purpose flour
Vegetable oil
3 quarts water
3/4 cups baking soda
2 whole eggs beaten, mixed with 1 tablespoon cold water

Combine the water, sugar, yeast, and butter in bowl.

Add the salt and flour and combine until dough begins to pull away from sides of bowl. Turn out onto a lightly floured surface and knead, knead, work those arm muscles and work out frustrations on the dough. You will have a pretty smooth ball of dough. ( can also use a standing mixer, but this way is much more fun!)

Oil a bowl with vegetable oil, add the dough and turn to coat with the oil. Cover with a clean towel or plastic wrap and place in a warm spot until the dough doubles in size, about 1 hour.

Preheat the oven to 425 degrees F.

Bring the water to a boil in a small roasting pan over high heat and add the baking soda.

Remove the dough from the bowl and place on a flat surface. Divide the dough into 8 equal pieces, about 4 1/4 to 4 1/2 ounces each. Roll each piece into a long rope measuring 22 inches and shape: take the right side and cross over to the left. Cross right to left again and flip up. Boil the pretzels in the water solution, 2 at a time for 30 seconds, splashing the tops with the warmed water using a spoon. Remove with a large flat slotted spatula or a spider. Place 4 pretzels on each baking sheet, brush the tops with the egg wash and season liberally with the salt. Place into the oven and bake for 15 to 18 minutes until golden brown.

Dip into garlic butter sauce, or anything your taste buds have a hankering to taste! (Is hankering a southern term?)

Sunday, April 11, 2010

Veggie Pancakes


Hello! Today I am writing my first post! I am also including a recipe that I created in my small kitchen in Northwest Georgia. Please bear with me as I learn the "ropes" of blogging and capturing the "good side" of my dishes in pictures.

Recently I found an online cooking club. The next six months the club is focusing on recipes by the talented, minimalist Mark Bittman. This week's theme was "small bites of Bittman" (Isn't that a cute way to describe appetizer recipes created by Mark Bittman?)

I searched the net, read a few books and decided to create Mr. Mark Bittman's Vegetable Pancakes. Living in the south and in the hills, we tend to call any vegetable that is cut, battered and fried "fritters".

When I first bit into one, I heard and felt a crunch. The crunch was followed by a creamy taste of awesome veggie goodness! Scallions and bell peppers were diced very fine, and carrots, potatoes and celery were grated. I think the starch in the potatoes helped hold the pancakes together. I also used an extra egg.

The recipe was easy, cheap and very fun. I added some garlic, paprika, and onion powder to spice them up. Anything can be added to suit someone's palate. Enjoy..I sure did!


VEGETABLE PANCAKES: (Mark Bittman)

About 1 1/2 pounds grated vegetables, peeled first if necessary (3 cups packed), and squeezed dry
1/2 small onion, grated; or 4 scallions
1 egg or 2 egg whites, lightly beaten
1/4 cup white or whole wheat flour, more or less
Salt and freshly ground black pepper
Olive or vegetable oil or butter for greasing the pan

  1. Heat the oven to 275°F. Grate the vegetable or vegetables by hand or with the grating disk of a food processor. Mix together the vegetables, onion, egg, and 1/4 cup of the flour. Sprinkle with salt and pepper. Add a little more flour if the mixture isn’t holding together.
  2. Put a little butter or oil in a large skillet or griddle over medium-high heat. When the butter is melted or the oil is hot, drop in spoonfuls of the batter, using a fork to spread the vegetables into an even layer, press down a bit. Work in batches to prevent overcrowding. (Transfer finished pancakes to the oven until all are finished.) Cook, turning once, until nicely browned on both sides, about 5 minutes. Serve hot or at room temperature.

Search This Blog